Scuttlebutt
2024-08-10 21:40 by Ian
Scuttlebutt is a RasPi4 setup that I built for my home's common area. It functions as a bulletin board and media PC.
Please pardon the terrible white-balance. The screen is bright.
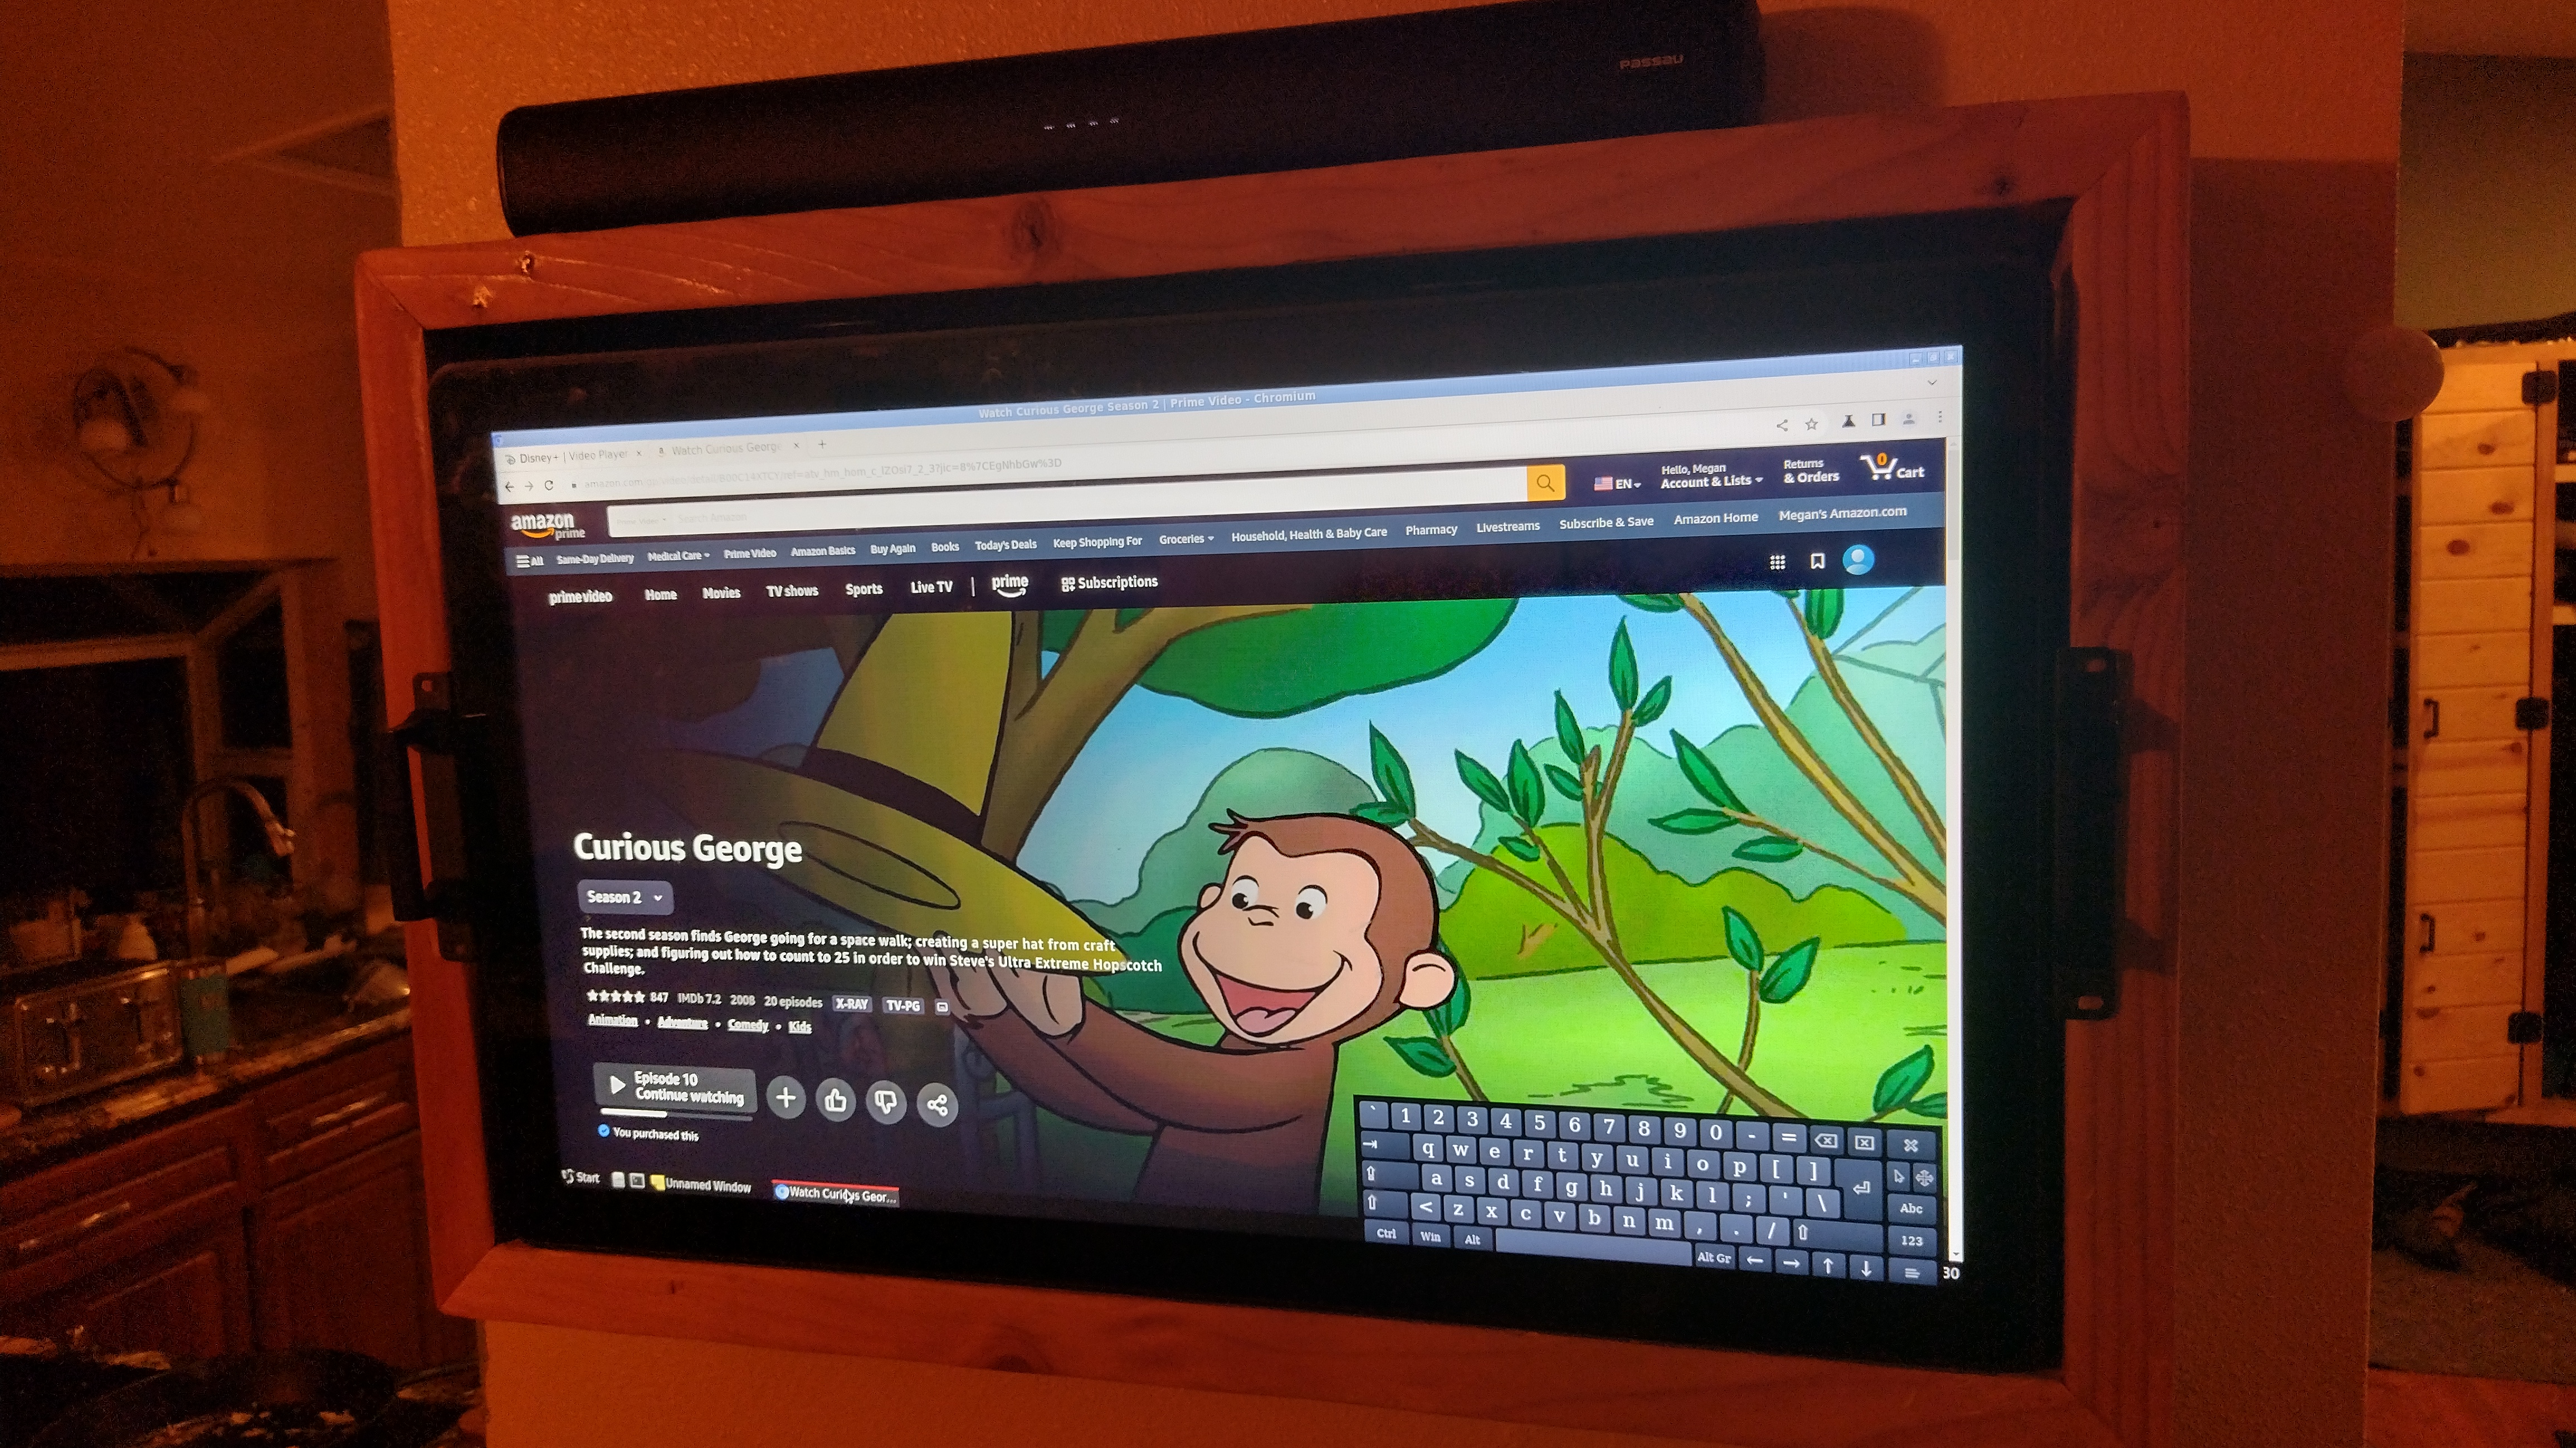
The build is dominated by the large capacitive touchscreen. It was designed to be purchased as a component by OEMs, and be built into larger appliances (kiosks, vending machines, public terminals, etc). The touchscreen was the most expensive part of the entire project at $650. But the quality is clear in the build and the ratings. It is bright enough to be seen outside during daylight, and was intended for harsh use.
After having four of them, I can tell you that children qualify as "harsh use". The tempered shield panel has withstood about one year of abuse by now.
There isn't much to say about the software environment. The RasPi4 runs DietPi, with some custom scripting and config to allow the machine to boot into the GUI without a login, start the onscreen keyboard, and so-forth.
The real effort here was nothing to do with the computer, but rather the building of the frame, and plumbing the power and ethernet connections.
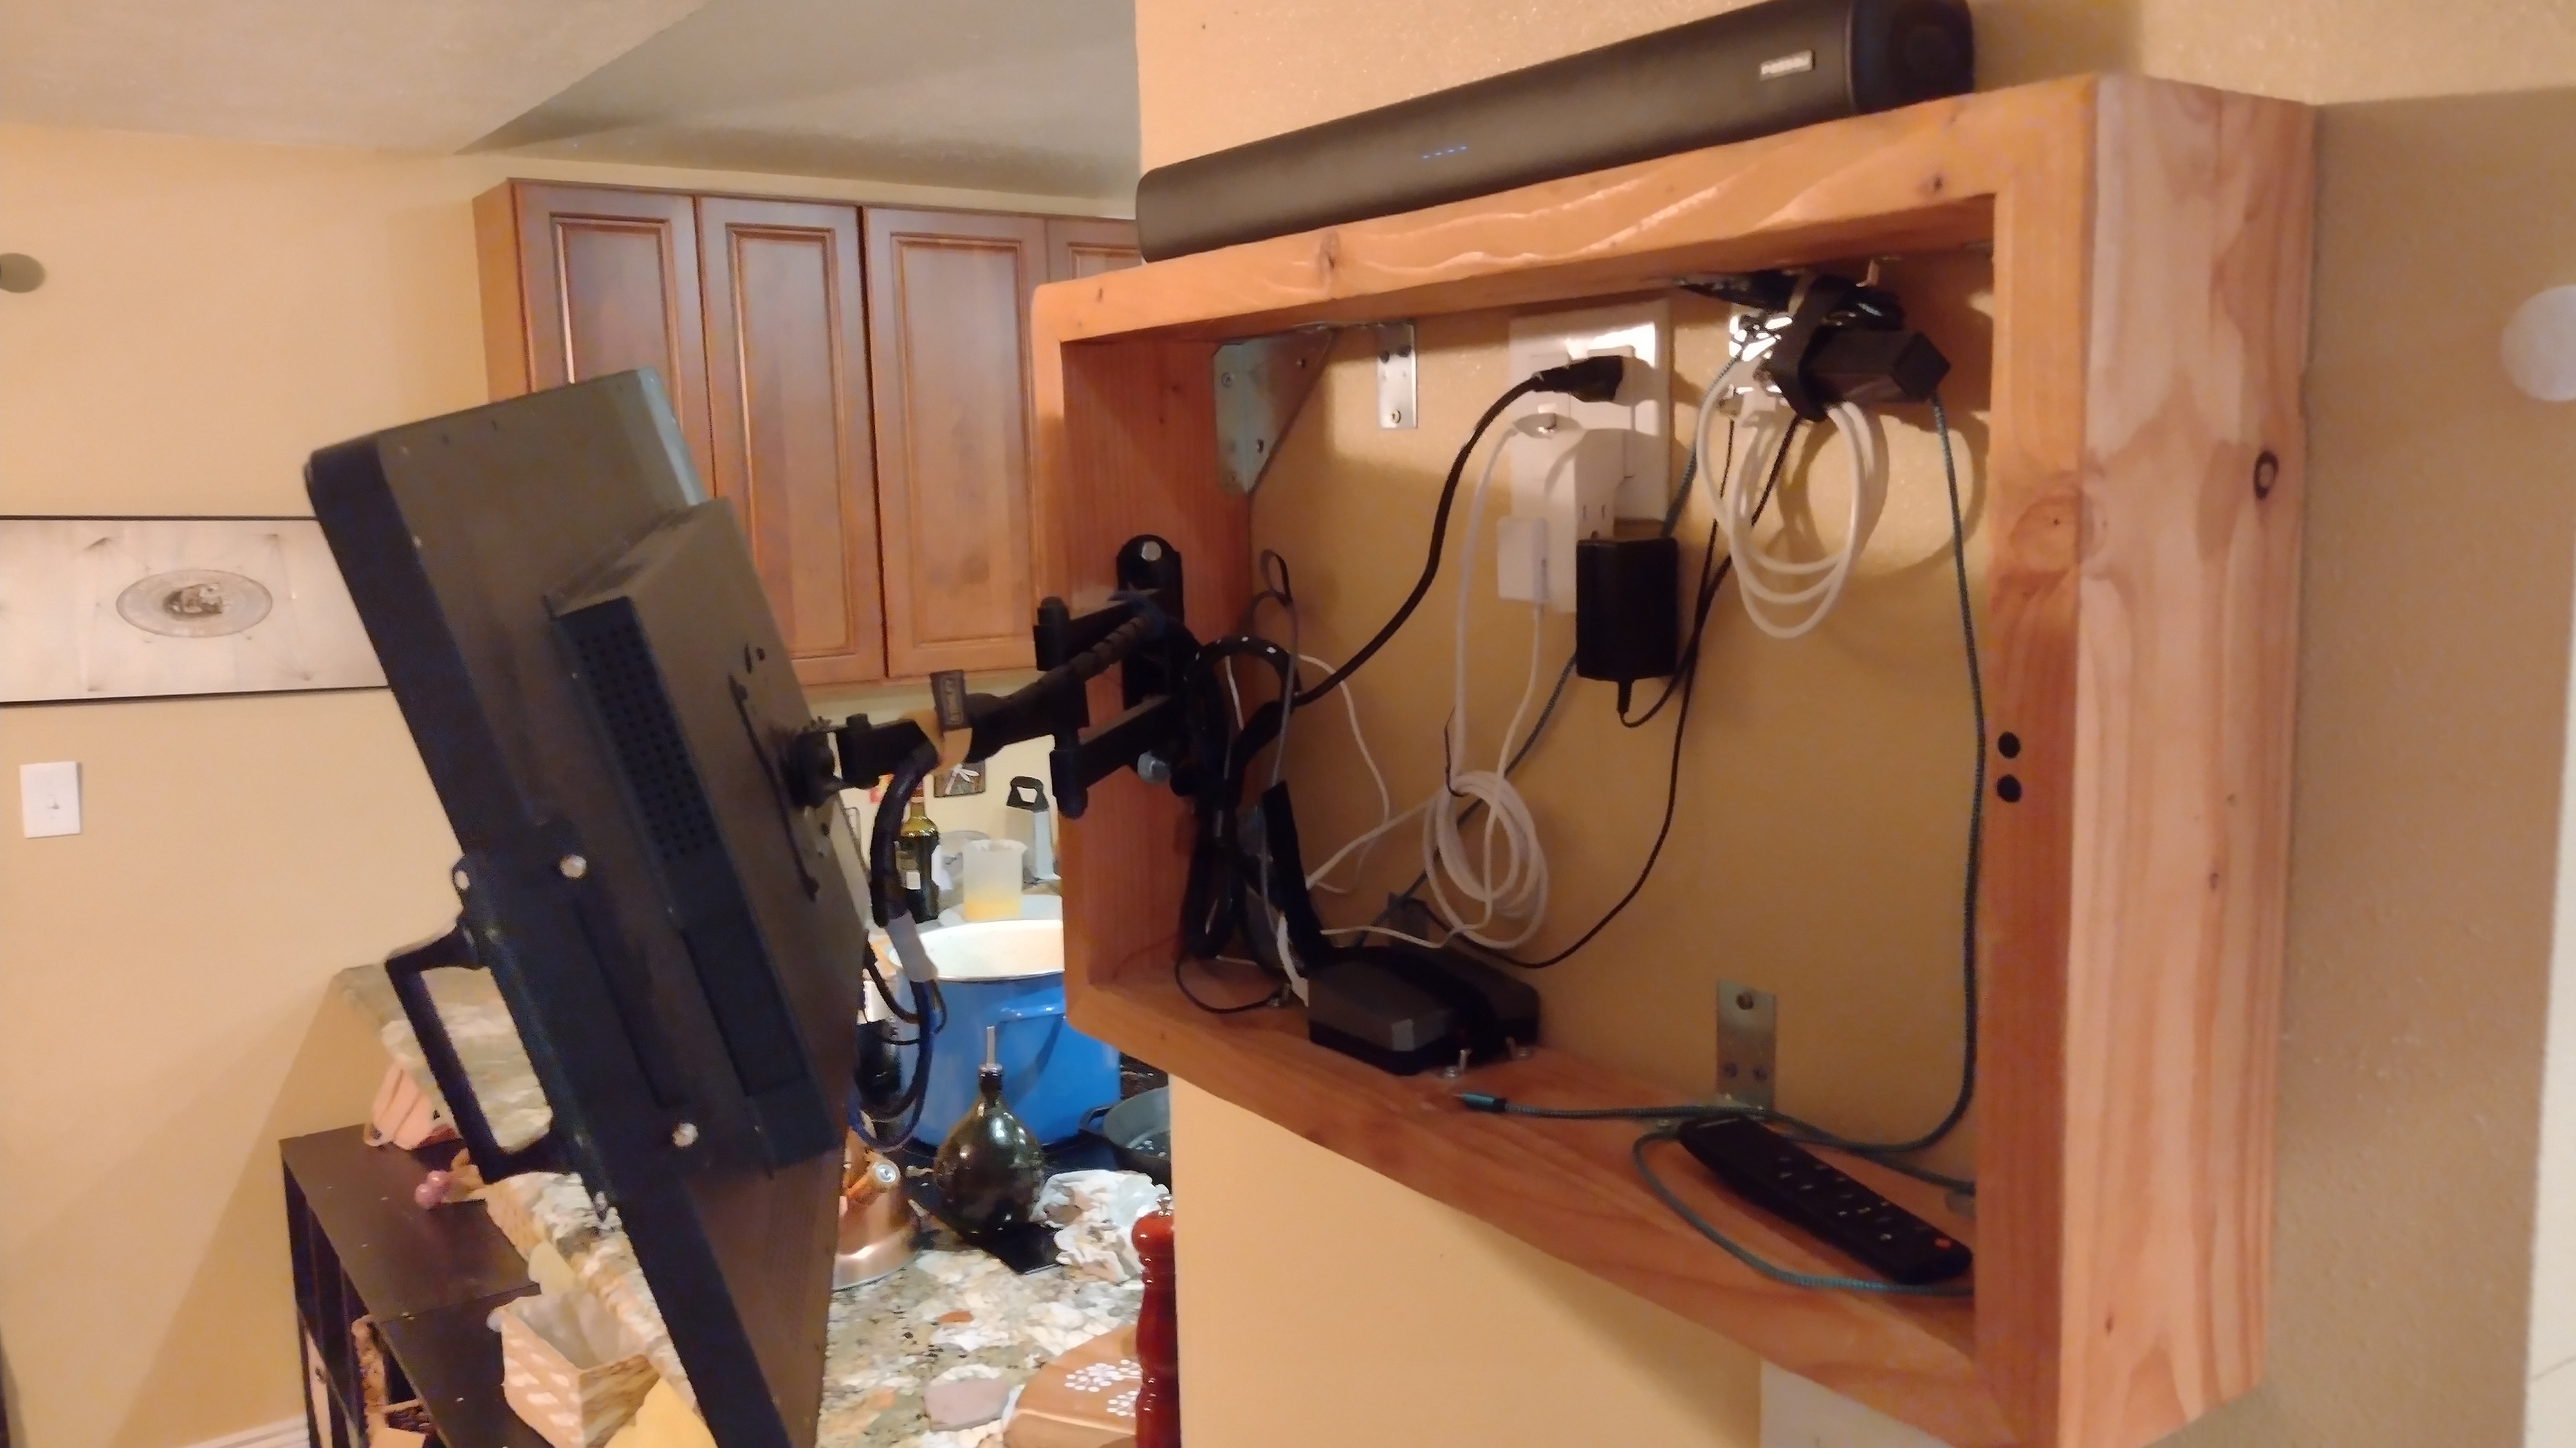
Here is an oblique view with the screen pulled out. The electronic arrangement here is easy to infer, and there is no special hardware. There is just enough space inside to allow for a phone, tablet, or other such thing to be set inside and attached to USB for charging or media sharing.
A monitor arm allows the screen is pulled out to face the couch during practical use as a media PC, And the screen even has enough mass to use the on-screen keyboard without changing the screen's position or orientation.
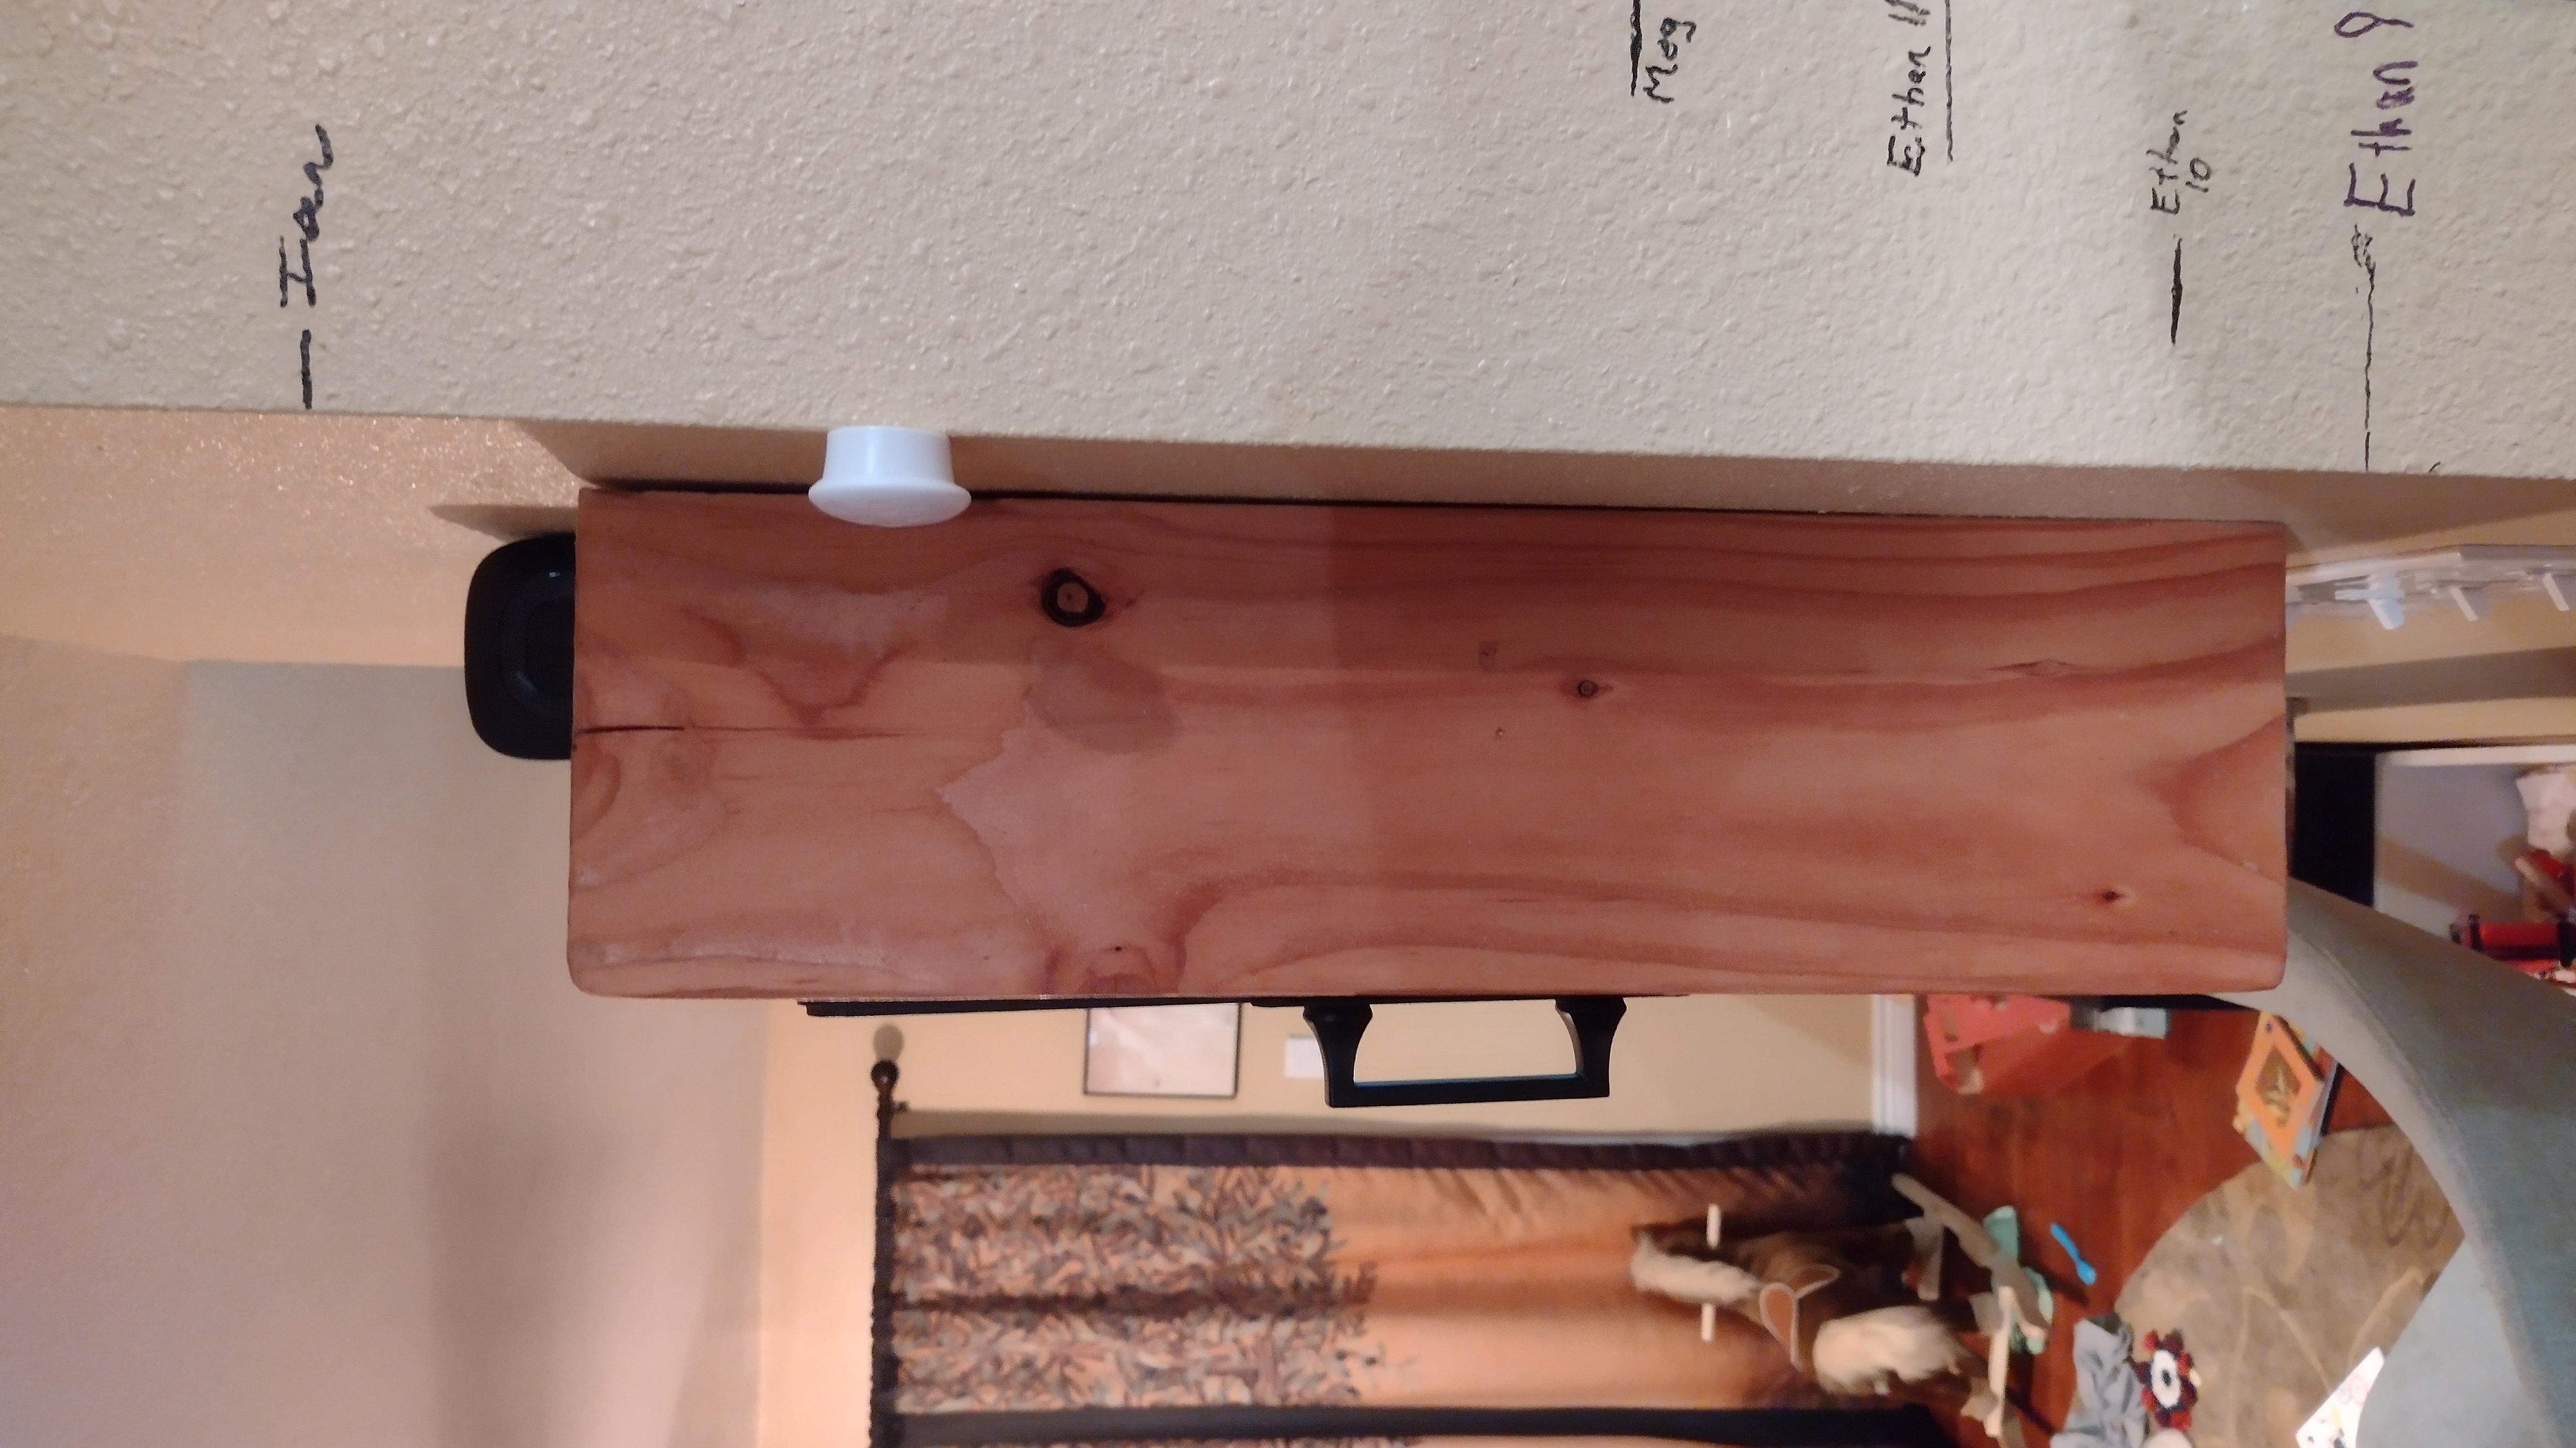
As a passively-attended bulletin board, the screen is stowed to hide the technological infrastructure, and to provide better support from the frame to resist forces from a user typing and mousing. You can see two of the four high-strength magnets that I embedded into the wood. Their purpose is to catch and retain the screen in the stowed position.
The frame is just uninteresting dimensional lumber that I planed/sanded/cut/stained, and then joined with brackets, screws and glue. It was sized for this specific touchscreen, and allows about a half-inch of clearance with the wall when the screen is stowed. This was the limiting dimension, with a small allowance made for cables that might flow into unfavorable positions. I made it as thin as I dared.
Here it is stowed and in profile, showing the handles I attached to the mounting brackets.
Previous: The hardest contract I've taken
Next: Why computers make terrible clocks